ControlAltDieliet 

- Home /
- Mattermost /
- Plugins /
- Webapp plugins
Plugins: The webapp part
In the previous article you learned about the serverside of a plugin .
Now we dive deeper in the webappside of the app. This part is written in Javascript. It uses Redux and you can write your plugin as well in Typescript. We will use Javascript in this article.
At the end of the article you will add an item to the menu and an icon to the channel header***.
The webapp part let your plugin change the layout and the user experience of Mattermost.
I made a git-repository from MatterMost Starter Template Plugin because it is minimalistic and is a good start.
My repository contains a branch for each further step. You can find it at The Mattermost demo plugin gives a very nice overview but can be overwhelming for a first start but is a good reference.
I also recomment to take a look at the Mattermost Developer Plugins Reference or the Todo bot as starting point.
1 Installing some dependencies
I assume that you already followed the steps from the previous articles
You have a server app already. Now we are going to add the webapp part, although you can write plugins that have just a server part or just a webapp part.
Run 'git checkout origin/webapp_step1' to see the code. You 'll see a new folder webapp plugin.
Because we removed the webapp in a previous version, there is no build in the Makefile. So a make clean will generate a new Makefile. In the code you downloaded, this is already done for you.
You also have to install some dependencies:
npm install --save-dev @babel/core @babel/preset-env @babel/preset-react babel-loader webpack webpack-cli
npm install --save react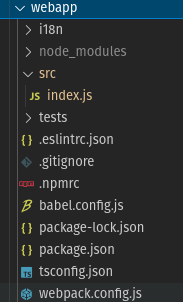
2 A closer look into the Webapp folder
Let's take a look at the Webapp folder.
The i18n folder will contain the translated strings for your app. We will not use this in this tutorial.
We ignore the tests folder as well.
The node_modules folder contains the necessary nodejs modules for building your app.
In the src you will write your code. We get back to that later.
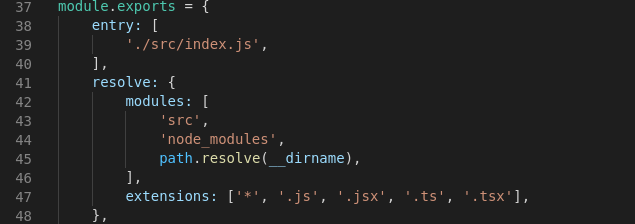
The webpack.config.js is important. Around line 37 you'll find module.exports = {entry: [ 'src/index.js']...
This line defines where your code for your webapp starts. If you start your webapp plugin in index.txs or start.js you'll have to modify this line or your webapp plugin will be empty.
3 The index.js file
We start with a minimal index.js file.
In the repository this is branch webapp_step2. Use 'git checkout origin/webapp_step2' to load the code
First we load react, than when define a class plugin. The code in the function initialize will run when the plugin gets enabled.
You have to register your plugin with the unique id that you also defined in the plugin.json file like we described here
          import React from 'react';

          class HelloWorldPlugin {
              initialize(registry, store) {
              console.log("Hello there in the console");
              }
          }
          window.registerPlugin('be.controlaltdieliet.demoortom.first_mattermost_plugin', new HelloWorldPlugin());

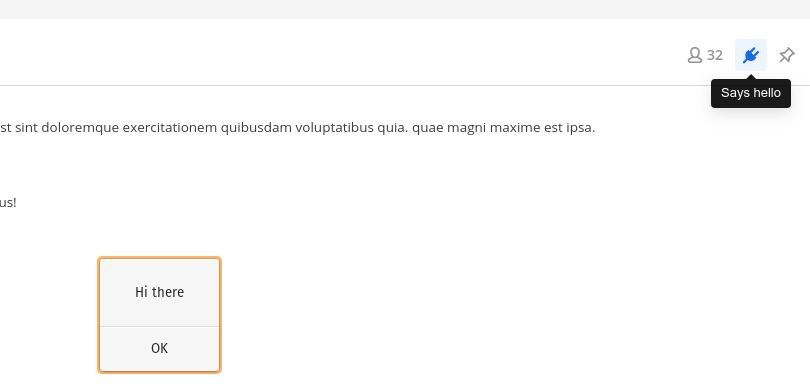
4 Adding a button to the channel header
From now on you can start implementing all the cool stuff that you find in the webapp reference.
Let's add a button to the top of every channel that says hello when you click it.
In the repository this is branch webapp_step3. Run 'git checkout origin/webapp_step3' to load the code
import React from 'react';
const Icon = () =>
<i className='icon fa fa-plug'/>;
class HelloWorldPlugin {
initialize(registry, store) {
registry.registerChannelHeaderButtonAction(
// icon - JSX element to use as the button's icon
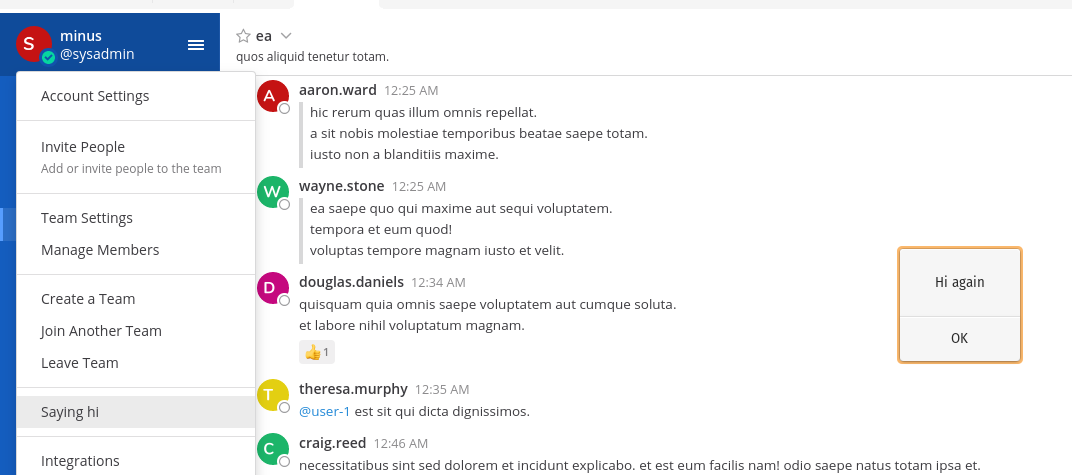
5 Adding an item to the Main Menu
In the same way you can add an item to the main menu. In just a few lines you have a new item.
In the repository this is branch webapp_step4. Run 'git checkout origin/webapp_step4' to load the code
  registry.registerMainMenuAction(
    "Saying hi",
    () => alert("Hi again"),
  );
6 Creating a React component
Just showing alerts is fun but we can do more. Let's create a component that you will add to the left channel panel.
For this we need to create a React component.
Create a new folder "components" in your src folder. In this new folder create a folder my_first_component.
In this folder create a file index.js.
We import React and create a class MyFirstComponent and render some html-code into it.
Run 'git checkout origin/webapp_step4' to retreive the code in your folder.
  import React from 'react'

  export default class MyFirstComponent extends React.PureComponent {
      render() {
          const iconStyle = {
              display: 'inline-block',
              margin: '0 7px 0 1px',
          };
          const style = {
              margin: '.5em 0 .5em',
              padding: '0 12px 0 15px',
              backgroundColor: 'rgba(255,255,255,0.6)',
          };
          const url= "https://developers.mattermost.com/extend/plugins/webapp/reference"
          return (

                <i
                      className='icon fa fa-plug'
                      style={iconStyle}
                  />
                  <a href={url}>More info on plugins</a<
          );
      }
  }
7 Displaying our component in the channelside bar
Now in the index.js file in the webappp/src folder you import your first component and add it to the left sidebar.
You can see this in the branch webapp_step5. Use git checkout origin/webapp_step5 to see the code
import MyFirstComponent from './components/my_first_component'
const Icon = () => <i className='icon fa fa-plug'/>;
class HelloWorldPlugin {
    initialize(registry, store) {
const {leftsidebarheader}=registry.registerLeftSidebarHeaderComponent(MyFirstComponent) 
8 Toggling the right sidebar
We created a new component RightSideFolder in the components folder.
This component will be shown in the right sidebar.
So first you import the the component as you did with your MyFirstComponent.
Then you register it with registry.registerRightHandSidebarComponent. This will return a variable that tells you if the sidebar is shown or not.
Finally you bind it to the channel header button with store.dispatch(toggleRHSPlugin)
When you click the channel header button you'll receive a well deserved applause!
Use 'git checkout origin/webapp_step6' to load the code
import React from 'react';
import RightSideBar from './components/right_hand_sidebar'
import MyFirstComponent from './components/my_first_component'
const Icon = () => <i className='icon fa fa-plug'/>;
class HelloWorldPlugin {
initialize(registry, store) {
registry.registerMainMenuAction(
"Saying hi",
() => allert("Hi again"),
);
registry.registerChannelHeaderButtonAction(
9 Let's start building your own plugins!
Congratulations! You made it to the end of this series and should be able now to start building your own plugins!